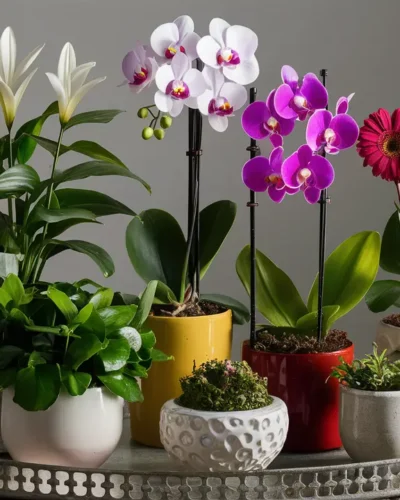
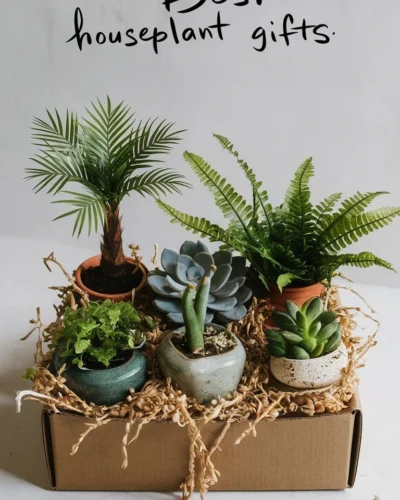
Welcome to the ultimate guide on how to grow your own jungle of lush houseplants from seed! If you’re looking to add a personal touch to your indoor oasis or expand your green thumb repertoire, you’ve come to the right place. In this comprehensive guide, we’ll walk you through every step of the growing houseplants from seed, from selecting the perfect seeds to nurturing your seedlings into thriving houseplants.
Table of Contents
Introduction
Are you ready to embark on an exciting journey into the world of plant parenthood? Growing houseplants from seed is not only rewarding but also offers a deeper connection to nature and the satisfaction of nurturing life from its very beginning. In this guide, we’ll cover everything you need to know to successfully sprout your own jungle of houseplants right at home.
Whether you’re a seasoned plant enthusiast or a novice gardener, this guide will equip you with the knowledge and skills to grow a diverse range of houseplants from seed.
But before we dive into the nitty-gritty details, let’s take a moment to explore why growing plants from seed is such a gratifying endeavor.
The Allure of Growing Houseplants from Seed
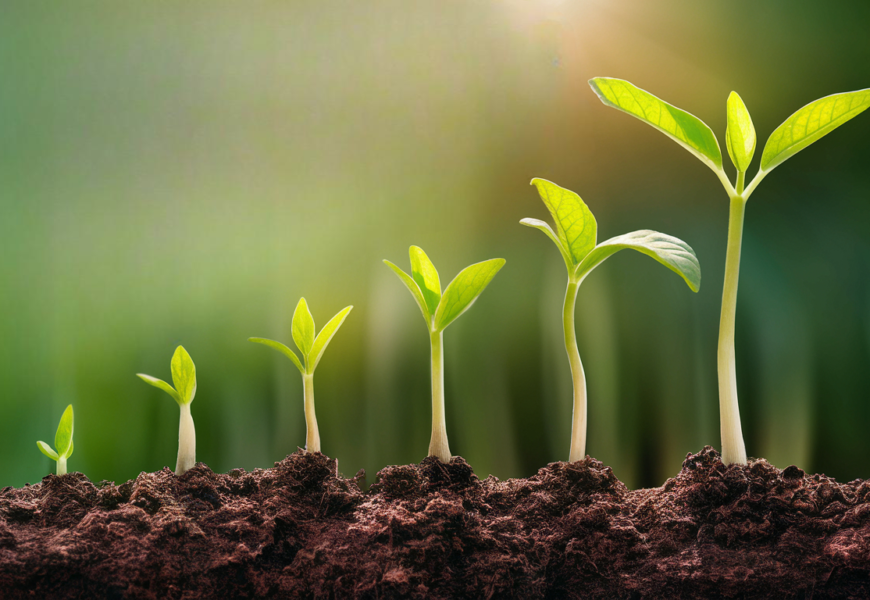
There’s something magical about witnessing the transformation of a tiny seed into a flourishing plant. From the anticipation of the first sprout to the joy of seeing your seedlings grow into mature plants, every stage of the process is filled with wonder and excitement.
Growing houseplants from seed also allows you to explore a vast array of plant varieties that may not be readily available as mature plants. Whether you’re interested in exotic flowers, rare foliage, or unique cultivars, starting from seed opens up a world of possibilities for experimentation and discovery.
Benefits of Growing Houseplants from Seed
Aside from the sheer delight of watching your plants grow, there are several practical benefits to starting your houseplants from seed. For starters, growing from seed is often more cost-effective than purchasing mature plants, especially if you’re planning to cultivate a large collection.
Moreover, growing from seed gives you greater control over the health and quality of your plants right from the beginning.
By carefully selecting your seeds and providing optimal growing conditions, you can ensure that your plants start off strong and resilient.
Overview of What the Guide Will Cover
In the sections that follow, we’ll delve into the essential steps and techniques for successfully growing houseplants from seed. From selecting the right seeds and creating the perfect growing environment to nurturing your seedlings through every stage of growth, we’ll provide you with all the tools and knowledge you need to cultivate your own thriving indoor jungle.
But before we embark on this botanical adventure, let’s take a moment to explore some relevant insights from my blog:
- “The Ultimate Guide to Simple ZZ Plants Care“: Just as caring for ZZ plants can be straightforward, growing houseplants from seed can also be simplified with the right guidance.
- “Why ZZ Plants Are the Easiest Houseplants to Keep Alive“: While ZZ plants are known for their resilience, growing houseplants from seed can be equally forgiving with the right approach.
- “Nature’s Tiny Time Capsule: The Magic of Growing Houseplants from Seed“: Delving into the process of growing houseplants from seed allows us to tap into the incredible potential and resilience of nature’s tiny time capsules.
Now, let’s roll up our sleeves and get ready to sow the seeds of your very own indoor jungle!
Getting Started With Growing Houseplants From Seed
Before you dive into the exciting world of growing houseplants from seed, it’s essential to lay the groundwork for success. In this section, we’ll cover everything you need to know to kickstart your seed-sowing journey with confidence.
1. Choosing the Right Seeds
- Consider Your Environment: Assess the lighting conditions, temperature, and humidity levels in your home to determine which plant species are best suited for your space.
- Research Plant Varieties: Explore different types of houseplants and their specific requirements to choose seeds that align with your preferences and lifestyle.
- Source High-Quality Seeds: Look for reputable seed suppliers or nurseries that offer a wide selection of fresh, viable seeds for optimal germination.
2. Essential Tools and Materials
- Seed Starting Containers: Select containers or trays that provide adequate drainage and space for seedlings to grow, such as seedling trays, peat pots, or recycled containers.
- Seed Starting Mix: Use a well-draining, sterile seed starting mix to provide a healthy growing medium for your seeds. Avoid using garden soil, which can contain pathogens and pests.
- Watering Tools: Invest in a watering can with a fine rose or a spray bottle to gently moisten the soil without disturbing delicate seedlings.
- Light Source: Depending on your home’s lighting conditions, you may need supplemental lighting such as fluorescent or LED grow lights to ensure proper growth and development.
3. Preparing the Planting Environment
- Choose a Suitable Location: Find a warm, well-lit area in your home where your seedlings will receive adequate sunlight or artificial light.
- Set Up a Germination Station: Create a dedicated space for germinating seeds, such as a seedling heat mat or a greenhouse kit, to provide consistent warmth and humidity.
- Clean and Sterilize: Disinfect your seed starting containers and tools with a mild bleach solution to prevent the spread of diseases and pathogens.
- Organize Your Workspace: Arrange your tools and materials in an organized manner to streamline the planting process and minimize stress on your seedlings.
By taking the time to carefully select your seeds, gather the necessary tools and materials, and prepare your planting environment, you’ll set yourself up for success right from the start. Now that you’ve laid the groundwork, it’s time to dive into the exciting world of seed germination!
But before we do, let’s take a moment to explore some relevant insights from my blog:
- “The Ultimate Guide to Simple ZZ Plants Care“: Just as caring for ZZ plants can be straightforward, growing houseplants from seed can also be simplified with the right guidance.
- “Creating a Beautiful Indoor Jungle with Self-Watering Planters“: Incorporating self-watering planters into your seedling care routine can help maintain consistent moisture levels for optimal growth.
Now, let’s roll up our sleeves and get ready to sow the seeds of your very own indoor jungle!
Seed Germination
Seed germination is the magical process where tiny seeds burst to life, sending out roots and shoots to become thriving seedlings. In this section, we’ll explore the ins and outs of seed germination and share tips to help you maximize your success rate.
1. Understanding the Germination Process
- Seed Activation: Seeds need the right combination of moisture, warmth, and oxygen to break their dormancy and initiate germination.
- Root and Shoot Emergence: Once activated, the seed absorbs water and swells, causing the outer seed coat to split. Roots begin to grow downwards, anchoring the seedling, while shoots emerge towards the light.
- Photosynthesis Begins: As the seedling grows, it starts producing its own food through photosynthesis, fueling further growth and development.
2. Techniques to Enhance Germination Rates
- Stratification: Some seeds require a period of cold stratification to simulate winter conditions and trigger germination. Place these seeds in damp paper towels or a moistened growing medium in the refrigerator for several weeks before sowing.
- Scarification: Hard-coated seeds may benefit from scarification, which involves nicking or scratching the seed coat to allow moisture to penetrate more easily.
- Pre-Soaking: Pre-soaking seeds in water for several hours or overnight can help kickstart the germination process by softening the seed coat and hastening water uptake.
3. Troubleshooting Common Germination Issues
- Damping Off: Damping off is a common fungal disease that affects young seedlings, causing them to wilt and collapse at the soil line. To prevent damping off, ensure good air circulation, avoid overwatering, and use sterile seed starting mix.
- Poor Germination: If your seeds fail to germinate, it may be due to factors such as improper moisture levels, temperature fluctuations, or expired seeds. Conduct a germination test on a small sample of seeds to assess their viability before sowing.
Relevant Insights:
- “Meet ZZ Plants: Your New Favorite Houseplants“: Just as ZZ plants thrive with the right care, understanding the needs of your seeds is crucial for successful germination.
- “The Science Behind Self-Watering Planters“: Incorporating self-watering techniques into your seedling care routine can help maintain optimal moisture levels during the critical germination stage.
With a solid understanding of the germination process and proven techniques to enhance success, you’re well-equipped to kickstart your seed-sowing adventure. Now, let’s move on to the next step: caring for your precious seedlings as they begin their journey towards becoming flourishing houseplants!
Seedling Care
Congratulations, your seeds have sprouted, and tiny seedlings are emerging! Now it’s time to provide them with the tender loving care they need to thrive and grow into healthy houseplants. In this section, we’ll cover everything you need to know to ensure your seedlings reach their full potential.
1. Providing Optimal Growing Conditions
- Lighting: Position your seedlings in a bright, indirect light location to promote healthy growth. If natural light is insufficient, supplement with fluorescent or LED grow lights placed a few inches above the seedlings.
- Temperature and Humidity: Maintain a consistent temperature between 65-75°F (18-24°C) and moderate humidity levels to create a comfortable environment for your seedlings. Consider using a humidity dome or misting regularly to increase humidity.
- Air Circulation: Ensure good air circulation around your seedlings to prevent fungal diseases and promote sturdy growth. Use a small fan set on low or gently brush your hand over the seedlings to mimic the wind.
2. Watering and Fertilizing Seedlings
- Watering: Keep the soil evenly moist but not waterlogged. Avoid letting the soil dry out completely or sitting in water, as both extremes can stress the delicate seedlings. Water gently at the base of the seedlings to avoid disturbing their fragile roots.
- Fertilizing: After the first set of true leaves appears, start feeding your seedlings with a diluted, balanced liquid fertilizer every 2-4 weeks. Be cautious not to over-fertilize, as this can lead to nutrient imbalances and damage the tender roots.
3. Preventing Pests and Diseases
- Monitor for Pests: Keep a close eye on your seedlings for signs of pests such as aphids, spider mites, or fungus gnats. Remove any affected leaves or treat with natural pest control methods such as neem oil or insecticidal soap.
- Maintain Cleanliness: Practice good hygiene by keeping your growing area clean and free from debris. Dispose of any fallen leaves or dead plant material promptly to prevent the buildup of pests and diseases.
Relevant Insights:
- “Sunshine Solutions: Choosing the Best Blinds for Thriving Houseplants“: Optimizing your home’s lighting conditions with the right window treatments can benefit both your seedlings and mature houseplants.
- “How Houseplants Become Your Natural Stress Busters“: Cultivating a nurturing environment for your seedlings can also have positive effects on your own well-being, providing a sense of calm and purpose.
With proper care and attention, your seedlings will grow stronger and more resilient with each passing day. Now that you’ve mastered the art of seedling care, it’s time to prepare for the next stage of their journey: transplanting and fostering their continued growth!
Transplanting and Growth
As your seedlings mature, they’ll outgrow their cramped quarters and need a bit more space to stretch their roots and spread their leaves.
Transplanting your seedlings into larger containers or the great outdoors is a crucial step in their journey towards becoming thriving houseplants.
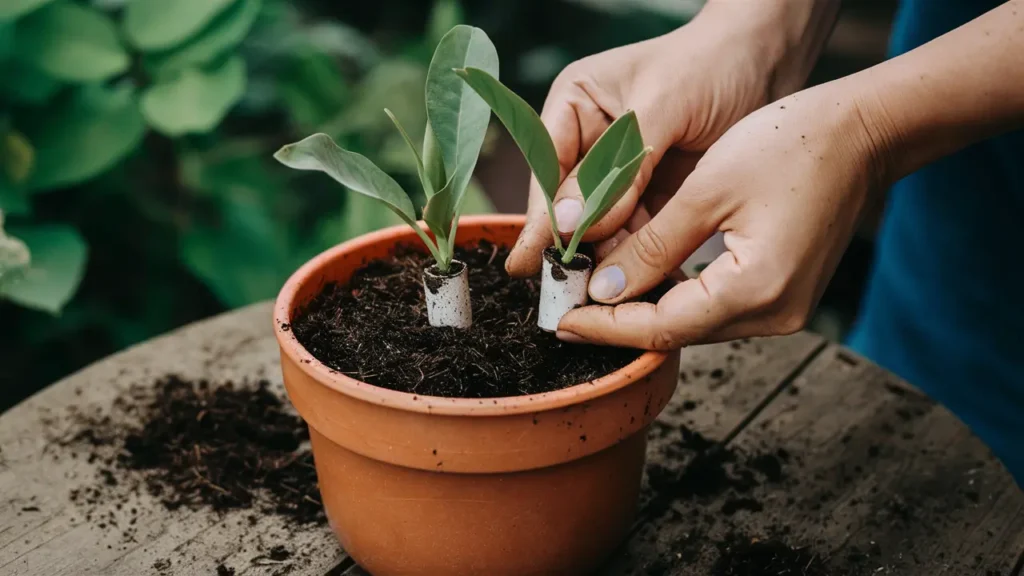
In this section, we’ll guide you through the transplanting process and share tips for fostering continued growth.
1. When and How to Transplant Seedlings
- Timing: Transplant your seedlings when they have developed a few sets of true leaves and their root systems have filled the current containers. This typically occurs 2-4 weeks after germination, depending on the plant species.
- Choosing Containers: Select containers that are slightly larger than the current ones, with adequate drainage holes to prevent waterlogging. Biodegradable pots or recycled containers are eco-friendly options that can be planted directly into the soil.
- Gentle Handling: Carefully remove the seedlings from their current containers, handling them by the leaves to avoid damaging the delicate stems and roots. Gently tease apart any tangled roots before transplanting into the new containers.
2. Maintaining Healthy Growth
- Proper Watering: After transplanting, water your seedlings thoroughly to help settle the soil around the roots. Continue to keep the soil evenly moist, but be cautious not to overwater, as soggy soil can lead to root rot.
- Gradual Acclimatization: If transplanting seedlings outdoors, gradually acclimate them to the new environment by exposing them to increasing amounts of sunlight and outdoor conditions over the course of several days.
- Sturdy Support: Provide support for tall or leggy seedlings by gently staking them with bamboo skewers or small stakes. This will prevent them from toppling over and encourage upright growth.
3. Tips for Encouraging Robust Development
- Pruning and Pinching: Regularly pinch back the tips of your seedlings to promote bushier growth and prevent them from becoming too leggy. Remove any yellowing or damaged leaves to maintain plant health.
- Regular Feeding: Continue to fertilize your seedlings every 2-4 weeks with a balanced liquid fertilizer to provide essential nutrients for growth. Adjust the strength of the fertilizer solution based on the growth stage of your plants.
- Observation and Adjustment: Monitor your seedlings closely for any signs of stress or nutrient deficiencies, such as yellowing leaves or stunted growth. Make adjustments to their care regimen as needed to ensure they have everything they need to thrive.
Relevant Insights:
- “Vertical Gardening: Make the Most of Limited Space“: Incorporating vertical gardening techniques can maximize your growing space and create a lush green oasis, both indoors and outdoors.
- “Frugal Foliage: 8 Affordable Houseplants to Beautify Your Backyard“: Cultivating your own houseplants from seed is a budget-friendly way to expand your plant collection and beautify your outdoor space.
With careful transplanting and continued care, your seedlings will continue to flourish and grow into beautiful, mature houseplants. Now, let’s celebrate the progress you’ve made and look forward to the verdant jungle that awaits!
Advanced Techniques
Congratulations on nurturing your seedlings into thriving houseplants! Now that you’ve mastered the basics of seed starting and seedling care, it’s time to explore advanced techniques to take your plant-growing skills to the next level.
In this section, we’ll delve into a variety of advanced methods and strategies for expanding your botanical horizons.
1. Propagation Methods Beyond Seeds
- Cuttings: Learn how to propagate new plants from stem or leaf cuttings, a technique known as vegetative propagation. This method allows you to clone your favorite plants and expand your collection without the need for seeds.
- Division: Divide mature plants into smaller sections, each with its own roots, to create multiple new plants. This is particularly useful for plants that naturally form clumps or have rhizomatous growth habits.
- Grafting: Experiment with grafting different plant varieties onto compatible rootstocks to create unique hybrids with desirable traits. Grafting can also be used to rejuvenate older plants or propagate rare species.
2. Experimenting with Hybridization
- Cross-Pollination: Explore the fascinating world of plant genetics by cross-pollinating different plant varieties to create hybrid offspring. This allows you to combine desirable traits from different parent plants and develop new cultivars with unique characteristics.
- Selective Breeding: Selectively breed plants over multiple generations to amplify specific traits such as flower color, size, or fragrance. This hands-on approach to plant breeding offers endless possibilities for creating novel and distinctive varieties.
3. Challenges and Rewards of Advanced Plant Cultivation
- Patience and Persistence: Advanced plant propagation and breeding techniques require patience and dedication, as results may not be immediate. Embrace the process and enjoy the journey of discovery as you experiment with different methods and combinations.
- Learning from Failure: Don’t be discouraged by setbacks or failed experiments. Every failure is an opportunity to learn and refine your techniques for future success. Keep detailed records of your experiments to track progress and identify areas for improvement.
Relevant Insights:
- “Boost Your Indoor Garden: The Essential Guide to 10 Growth Factors“: Understanding the various factors that influence plant growth is essential for success in advanced plant cultivation techniques.
- “Vertical Gardening vs. Horizontal Gardening: Which Is Right for You?“: Consider incorporating advanced propagation and breeding techniques into your vertical or horizontal gardening setup to maximize space and diversity.
With a willingness to explore new techniques and embrace the challenges of advanced plant cultivation, you’ll unlock a world of possibilities for creativity and innovation. Now, let’s roll up our sleeves and dive into the exciting realm of plant propagation and hybridization!
Troubleshooting
Even the most experienced plant parents encounter challenges along the way, but fear not! In this section, we’ll equip you with the knowledge and strategies to tackle common issues and keep your plants thriving.
1. Identifying and Addressing Common Problems
- Yellowing Leaves: Yellowing leaves can indicate a variety of issues, including overwatering, underwatering, nutrient deficiencies, or pest infestations. Assess the plant’s growing conditions and address any underlying issues accordingly.
- Wilting or Drooping: Wilting or drooping foliage may be a sign of underwatering, root rot, or environmental stress. Check the soil moisture levels and adjust your watering schedule as needed. Ensure proper drainage to prevent waterlogged soil.
- Pest Infestations: Common pests such as aphids, spider mites, and mealybugs can wreak havoc on your plants if left unchecked. Inspect your plants regularly for signs of pests and treat affected areas promptly with natural pest control methods.
2. Strategies for Rescuing Struggling Plants
- Repotting: If your plant is showing signs of root-bound growth or soil compaction, it may benefit from repotting into a larger container with fresh potting mix. Gently tease apart tangled roots and provide ample space for new growth.
- Trimming and Pruning: Trim away dead or yellowing leaves, stems, or flowers to improve airflow and promote healthy growth. Prune back overgrown or leggy branches to encourage bushier growth and maintain the plant’s shape.
- Adjusting Environmental Conditions: Evaluate the plant’s growing environment and make adjustments as needed to address any stressors. This may include adjusting lighting levels, humidity levels, or temperature fluctuations.
3. Resources for Further Assistance
- Online Forums and Communities: Join online gardening forums or social media groups to connect with fellow plant enthusiasts and seek advice from experienced growers. Share photos and descriptions of your plant’s symptoms to receive tailored recommendations.
- Local Nurseries and Extension Offices: Reach out to your local nurseries or cooperative extension offices for personalized guidance and assistance. They can provide valuable insights and recommendations based on your specific growing conditions.
- Educational Resources: Invest in books, articles, or online courses on plant care and troubleshooting to expand your knowledge and skills. Learning from reputable sources can empower you to become a more confident and successful plant parent.
Relevant Insights:
- “How to Deter Pets from Chewing on Houseplants: Effective Tips“: If your furry friends are causing damage to your plants, explore strategies for keeping them at bay while protecting your greenery.
- “Breathe New Life into Your Houseplants: Repotting Done Right“: Proper repotting techniques can rejuvenate struggling plants and set them on the path to recovery.
By being proactive and attentive to your plants’ needs, you can overcome challenges and create a thriving indoor jungle that brings joy and beauty to your home.
Now, armed with the knowledge and resources to troubleshoot common issues, you’re ready to tackle any plant-related problem with confidence!
Conclusion
Congratulations on completing the ultimate guide to growing houseplants from seed! You’ve embarked on an exciting journey into the world of plant parenthood and equipped yourself with the knowledge and skills to cultivate your own indoor jungle. As you reflect on your newfound expertise, let’s recap the key points and celebrate your achievements.
1. Recap of Key Points
- Starting Strong: You’ve learned how to choose the right seeds, gather essential tools and materials, and create the perfect planting environment to kickstart your seed-sowing adventure.
- Nurturing Growth: Through seed germination, seedling care, and transplanting, you’ve provided your seedlings with the love and attention they need to thrive and flourish.
- Exploring Advanced Techniques: You’ve delved into advanced propagation and hybridization methods, unlocking endless possibilities for creativity and innovation in your plant-growing endeavors.
- Overcoming Challenges: Armed with troubleshooting strategies and resources, you’re prepared to tackle common issues and keep your plants healthy and vibrant.
2. Final Thoughts
- Gratitude: We’re grateful to have accompanied you on this botanical journey and hope that you’ve found the information and guidance provided in this guide valuable and inspiring.
- Happy Planting: As you apply the knowledge and techniques you’ve acquired, may your indoor jungle thrive and bring joy and beauty to your home for years to come.
- Remember: Whether you’re sprouting seeds, propagating cuttings, or tending to mature plants, always remember to enjoy the process and take pride in the lush and vibrant oasis you’ve created.
Now, go forth and let your indoor jungle flourish! And remember, should you ever need guidance or inspiration along the way, your plant-loving community and trusted resources are just a click or a leaf away.
Happy planting!
FAQ
How long does it take for seeds to germinate?
A: The germination time varies depending on the plant species and environmental conditions. Some seeds may sprout within a few days, while others may take weeks or even months to germinate fully.
Do I need special equipment to grow houseplants from seed?
A: While specialized equipment such as seedling trays, grow lights, and heat mats can optimize the germination process, they’re not strictly necessary. You can start seeds using basic materials like recycled containers, potting mix, and natural sunlight.
Can I use seeds from store-bought fruits and vegetables to grow houseplants?
A: Yes, you can collect seeds from store-bought fruits and vegetables and attempt to grow houseplants from them. However, keep in mind that seeds from hybrid or genetically modified varieties may not produce true-to-type plants.
How often should I water my seedlings?
A: Seedlings require consistent moisture to thrive, but it’s essential to avoid overwatering, which can lead to root rot. Water your seedlings when the top inch of soil feels dry, and adjust your watering frequency based on environmental factors like temperature and humidity.
What should I do if my seedlings are leggy?
A: Leggy seedlings typically result from insufficient light or overcrowding. To encourage compact growth, provide your seedlings with brighter light and space them out to allow for proper airflow.
How can I prevent pests from attacking my seedlings?
A: Maintain good hygiene practices by keeping your growing area clean and free from debris. Inspect your seedlings regularly for signs of pests, and treat affected areas promptly with natural pest control methods such as neem oil or insecticidal soap.
When is the best time to transplant my seedlings into larger containers?
A: Transplant your seedlings into larger containers when they have developed a few sets of true leaves and their root systems have filled the current containers. This typically occurs 2-4 weeks after germination, depending on the plant species.
What should I do if my seedlings are wilting or drooping?
A: Wilting or drooping seedlings may indicate underwatering, root rot, or environmental stress. Check the soil moisture levels and adjust your watering schedule accordingly. Ensure proper drainage to prevent waterlogged soil.
How can I learn more about advanced plant propagation techniques?
A: Explore educational resources such as books, articles, and online courses on plant propagation and hybridization. Joining online gardening forums or social media groups can also provide valuable insights and guidance from experienced growers.

